Thursday, September 4, 2014

11) Wiring In and Actual Progress

Wiring Wiring Wiring Smoke?

I spent a lot of time trying to figure out how to wire the bike. Bought a wiring harness for the Harley Road Glide fairing and needed to merge it with the existing Honda harness. I found both the Harley and Honda wiring details online and purchased multiple weather resistant connectors to plug them together.


 I installed all the wiring including a new radio, ignition and tank mounted dash with all the indicators. It looked great and when I first turn it on everything was working.


Until I smell it and than saw it. Smoke! TURN IT OFF! TURN IT OFF!

So began the search for what was smoking, and why. It is usually easy to find the what. The key is to make sure you find all of the "Whats".  Than the important "Why", Because if you do not determine why it will happen again.

Began by removing tape from the bundle the smoke appeared to be coming from. Found one of the ground wires totally melted. I had to clear the entire bundle as the wire melted the adjacent wired.
Also found a totally blown 20 amp fuse. So the search resulted in finding that I was in to big of a hurry to power it up. I had a hot wire go to ground resulting in letting the magic smoke out.


Replaced the damaged wire, re-taped, and made sure everything was properly terminated. And again turned everything on and waited.

No Smoke!

So finally some real progress. Mounted all the relays, installed all the gauges (fuel level, temperature, voltmeter and a clock), mounting the rear fender, installing level sensor and fuel lines. Need to run plug wires and complete the wiring of the rear lights. Possibly in the next month put some gas in the tank and see if the bike restarts with the only smoke coming out of the exhaust.

Friday, May 16, 2014

10) Finally Some Progesss

The tank is headed for primer!

Finally the gas tank has progress past welding and rewelding, the main wiring has been reinstalled, I have figured out how to wire the Harley ignition and various indicators into the Honda harness, completed the fairing mounts and mounted the coils. I actually have made some progress once the gas tank issues are finally (hopefully) behind me.
 I believe in my previous blogs I outline how the gas tank would be the foundation of the look of the bike as well as how the tank was to be the biggest challenge. Well no matter how I framed the effort to modify the tank it was an understatement. I know the person I had do the modification was becoming frustrated with it as was I. But there was a level of expected evolution in the chasing of pin holes. So after the tank was at the fabricators for a couple extra weeks I went an got it and figured I would take on the challenge. I mean I have some skills, right?

What a mistake. Right away I noticed the tanks was pretty tight except for around the flange for the level sensor. No problem, pulled out the Oxy-Acetylene tanks and proceeded to make a mess.

Once I got my technique back, (it has been awhile) I was able to fill the holes I made and ran some nice beads around the flange and I was happy. Until I heard the first pop. With a closer look I could see the crack at the root of my brand new weld. No problem, fired up the torch again and ran another well placed and formed bead over the crack. This time there were two pops. 

Ok, slow down, lets think about this. The flange is about 1/8 inch thick, the tank is maybe 18 gauge (or about 0.05 inches). As I try to remember back, hoop stress and thermal expansion may have something to do with this. So I welded up the new cracks and tried quick quenching which worked. Than I remembered how quenching will harden the steel making it more brittle. So I pulled out my rosebud (this is a very large Oxy-Ace torch tip) and carefully annealed the area around the flange to add some ductility back into the metal. This was working great until I heard it POP! Well now I am really getting a little frustrated.  Welded it up, quenched it and walked away.

The next day I installed the level sensor flange, pitcock and gas caps.  This was to allow filling the tank with water to make a final check for leaks and measure the flow rate through the pitcock. The first thing I noticed was the vented gas cap was working but not as well as I had hoped. I was only getting about 1 gallon in 8 minutes. Without the cap I could get 3 gallon in less than 4 minutes. So I made the decision to add a vent tube to the tank. More welding/brazing, but it did come out pretty good and works great.
During all the flow testing I noticed the level sensor flange had a slow leak. The best I could tell it was not leaking from the weld but by the gasket. After trying to tighten up the flange to seal the leak did not work a closer look revealed all the welding had warped the flange. So I did some initial grinding to try to flatten the surface and resorted to the magic of J-B Weld. Applied it as per the directions, sanded and lapped it flat and now I have a solid, flat and leak free flange.


I cleaned, etch and seal the internals of the tank with the Kreen tank sealing kit and covered all the welds with filler to give the tank a smooth finish. Once the filler is sanded and all surfaces are cleaned I will primer the tank and not look back (hopefully).

Next up is finish the air box, wire the fairing, mount the rear finder and about a million other things. Still having fun and may even finish this some day.

Friday, February 21, 2014

9) The Project is Home

Tank modification done so back to work, Maybe?

The project made it home on February 12th. I took the bike to the fabricator on November 14th, so it has taken about 3 months for the modification. I did not want to rush the fabricator so I was very patient. You may have been wondering what was I doing during all that time. Being retired I took care of the cats, went to the beach, but mostly I finally got around to rebuilding my motorcycle trailer.


 I finished rebuilding the trailer just in time to pickup the project from the fabricators. The trailer looks pretty good don't you think? And it is good to have the bike home too!

 
As I was hoping the tank went from a 4 gallon capacity to a 4 3/4 gallon. Below are the before and after picture.  We were able to add a port for a level indicator which looks like it should work well. 

  I needed to clean and coat the inside of the tank, so I bought a kit from Kreem which includes a cleaner, etcher, and a coating. So I fill the tank to check the volume and start the cleaning when I noticed;

 So the tanks needs to go back to the fabricator for some touch ups. But I still have a lot of work to do on the bike.  I need to start final mounting of the air box, move the coils, modify the seat pan, hang the rear fender and mount the fairing. Well those and about 500 other things to figure out and stress on.

But I think it is going to come together with a little time and patients.


Sunday, December 29, 2013

8) Waiting for the Tank Mods

Waiting waiting and waiting

I took the tank and the bike to the fabricators on November 14th and have been working with them periodically to insure we all are on the same page. The Fabricator, lets call him Billy, is doing a good job. He really want to make sure I get what I want. So he has been calling me before each step, we discuss it and than he makes the cut or welds the bracket. This is all fine, BUT I want my project back.

Here is a photo with the tank almost in position, the bottom has totally been cut out.

I was down just after Christmas and it appear to be ready to weld in the new bottom, with a level sensor I found on Ebay. So what have I been doing while waiting for the tank you might ask.

Well, spending money is the short answer.

I continually monitor Ebay for something I might need.  I have purchased the inner and outer fairings off of a 2010 FLTR Road Glide. Some scratches and broken tabs but it was a good price. I took it down to the fab shop to see how it was going to set.  It should look pretty good.

I bought a rear fender off of a 2009 FLH Electro-Glide and than found the taillight off a 03 and blinkers off a 2000. I finally found the headlights at a good price that will fit the fairing. Winter is the best time to buy used motorcycle part as riders clean up around their shops because it maybe to cold or wet to ride.

You may have noticed I am getting a mixture of years as well as model Harley parts to put into this project. The gas tank was for a 1995 FXDWG Dyna Wide Glide Harley, and the tank topped dash is for a 1995 FLST Heritage-Softail with the speedometer mounted in it. As I work through what this will look like I am picking and choosing what I like. Last week I bought the fairing wiring harness for a 1998 Road Glide and I started to try to figure out which plug is for what.
I think there is going to be some issues with trying to wire a 1998 Road Glide, a 1995 Heritage, and a 2009 Electro Glide to a 1994 Honda Goldwing.  Well I did say in the first Blog I was looking for challenge.

The bike should be back early next year. Which accurately is next week.  I am hoping for a great new year as I begin to assemble my project.  


Saturday, November 9, 2013

7) The Gas Tank Challenge

Everything depends on the tank

The size, position, and shape of the gas tank really can make the look of a bike. So it is vital you spend time thinking about it. So I have spent hours and hours stressing over what to do about the tank. First there is no standard tank I can buy that will fit on this bike.
I have cut the stock air filter box down and installed a customized K&N air filter to lower the overall profile. Than I needed to purchase a tank that was wide enough to fit over the frame.  The tank is a Wide Bob Stretch tank form a Harley Davidson. I did buy a Harley split tank off Ebay hoping it would work.  But when I looked into mounting the spit tank and finding a dash that would fit it got very complex.  So I went to the local Harley dealer and spent three hours going through catalogs to try to meet my needs.  I needed a tank that was a minimum 14 1/2 inches wide, maximum 19 inches long, 5 gallon capacity, fit a dash with mechanical speed-o and have an installed level sensor. Believe it or not this does not exist. So what will I have to compromise on was the question.  There were no 5 gallon tanks that could take a mechanical Speed-o. Late models that were the larger tanks all went electrical speed-o, and if you wanted a level sensor you need a late model as well. So I settled on a 4 gallon stretch tank which is 21 inches long and 16 inches wide and no fuel level sensor.
The 16 inch width gives me the frame clearance needed but the 21 inch length means I will need to modify the seat pan.  But with this tank I was able to buy the right dash and electronics to go with it. So now I need to make it fit the bike. Here are a couple photo shopped pictures looking at the tank profiles.

The left photo shows a level tanks and the right is tapered. Subtle changes can make a huge difference in the look of the bike.
So now I need to cut the belly out of the tank to fit the frame and lower it a minimum of 2 inches over the frame. This will get the tank to a starting position and allow me to see what else is necessary to find that optimum final tank position and look. I laid out the potential cut lines and took the tank to a local fab shop to see what they thought and to get an estimate.
 
It goes without say they have never done anything like this before. They were kinda excited but also hesitant. I left with the tank and I am waiting for their call. I hope they call soon and I hope the estimate is reasonable. Even though what I am asking for may not be.

Sunday, October 20, 2013

6) Motorcycle Parts Have Arrived

How will the new parts fit?

One of the major issues I have found in trying to go none standard, off the normal path, the road never taken is no one know what you want when you try to order parts. The internet is a great way to shop for any and all parts. You can find anything you just have to know what you want and what it was designed for.

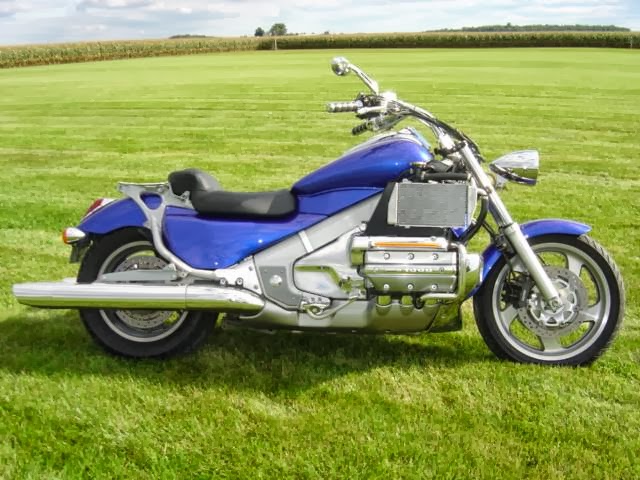
You may recall my project is to take a touring bike (GL1500 Interstate) and turn it into a Cruiser similar to this;
With a standard fuel tank, (not the faeux tank on the Honda), a frame mounted fairing, (smaller than the Honda) and simpler overall than the Honda Goldwing 1500 which is a big motorcycle.

In the last Blog (#5) I discuss the disassemble and the removal of the fuel tank which was a challenge and the new Fatboy tank I ordered off Ebay. When the new tank arrived the challenge of making things fits began.

So I quickly took the new tank to see how it was going to fit. I knew there was going to be impact but I was hoping maybe minor tank modification or air box changes would be the extent. Well, no.

I was once told by one of my supervisor, "hope is not a strategy." This is so true. You can hope something will work but if you have not done the necessary research it comes out to be more of a guess. So I know I wanted a fatboy styled fuel tank and I kinda hoped (guessed) it would be OK. But I also knew I had to make a leap to see where and what I needed to do.  So now I could scope out how I can modify the air intake system and fold the Harley parts into my project.

My scoping started on the internet looking at aftermarket air intake systems. The system I tunneled in on was those put together by K&N air systems. I found one that I thought could have a chance of fitting into the frame. It looked good, small and simple, but I needed actual dimensions. I initially searched online specifications and found out the size of the shipping box, 12" x 12" x 20". Well not really the dimension I need.

Next I watched a few U-Tubes hoping for scale. So how big is a normal hand? That did not work either. So I decided to go right to the horse. I logged on to the K&N web page and sent them an E-mail asking for the physical dimension of their 57s-9500 air filter system and waited for the response. The response I got was they did not know!!

How can they not know! I continued to look at this air system and really liked it. So again I logged on the K&N web page and went to a Live Chat and again asked for the overall dimensions. And again the responses was they do not know. The only real information they have is what cars their systems will and will not work fit. I got a little frustrated and responded that it must be necessary to buy the unit for $135 to find out actually how big it is. At that point he guessed 7 1/2" wide and 8" long. Which would fit, so I order it, "hoping" he was close.

Well the 57s-9500 air filter will fit perfectly. Now I have a fuel tank and the air filter that will be the basis of the transition. I just needed to attach the air filter to the carburetor and make that fit under the fatboy fuel tank. 
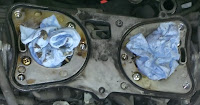
This is a picture showing the space under the fuel tank and the top of the carburetors. You can see there is less than two inches of clearance and a very odd shaped carburetor flange.
So it was time to get creative. My first thought was to have a flange manufactured that would mate up with the carburetor and than piped to the air filter. This would be very elegant and is an option. But than I found a Honda Goldwing 1500 stock air filter box on Ebay for $4 and I had another idea. Can I modify the stock air filter box to fit under the tank and still tie it to the K&N air filter. And when the stock air filter arrived the cutting began and.......

Modifying a Honda Goldwing 1500
K&N Air Box in a Goldwing 1500
I was also able to build a aluminum box behind the K&N box where I want to move the coils and other relays.

Modifying a Honda Goldwing 1500
Honda Goldwing 1500 Cruiser project
 I have also been researching the electronics and instruments I am going to need, like the speedometer and fuel level indication. So what I have decided to do is buy a new fuel tank with a chrome dash, ignition switch, as well as fuel level sensor and other indicators/instruments. Once I have the new tank I will have it modified to sit lower on the bike for a sleeker look and also allow a clean fit underneath. Next step will be permanently mount air box, route plug wires to the new coil location, buy the right fuel tank and find a weld shop that can weld/modify a fuel tank.  For sure that is not me. 


Sunday, October 6, 2013

5) Bike Stripped and Waiting for New Life

Disassembly and Labeling Everything

I finally finished disassembly;
 
I took off everything I didn't want or felt I didn't need. Every time I took something off I would see if the bike would start. If it didn't I would re-install or reconnect. So all of the plastic had to go (the fairing and bags), there was a lot of plastic, as well as a very large gas tank. 

I spent a couple days just tracing and labeling all the wiring and vacuum hoses. Tons of plugs/connectors that all seem to have purpose. Again I would disconnect them one at a time and see if the bike would start.

Now the bike is covered with labels detailing each connectors purpose or what all the vacuum hoses were for. This is so after I strip everything off the bike, to clean it up, I hopefully will be able to reconnect them and the bike will run.
The gas tank removal was a nightmare. I followed the shop manual direction which required removing the rear tire, but the darn thing would not come out. First I had to remove the starter which gave me another half inch, but not enough. Then I needed to drop the swing arm so I removed the shocks, which only got me another quarter inch. The swing arm was now sitting on the exhaust system so I had to remove it.  If you have ever removed old, rusty, and seized studs and bolts you know they normally break. And yes I broke a few. But once the tank was out the amount of free space is amazing. I am thinking of building a box in this area for all the electronics.

The new replacement gas tank I bought off Ebay should be here next week. When I finally get it I will see how it sets on the bike and determine how the new gas tank will work (and that is being hopeful). At this point I will be able to start designing the new air box for the top of the carburetors. I will need to get creative because there will not be a lot of room.
The carbs extend above the frame and I am hoping below the two new gas tanks.


I have been looking at various aftermarket air filter systems but there will need to be a low profile adapter manufactured for the top of the carbs. So now I have a lot of planning, thinking and hoping to start bring this bike back to life.